Almost Finished . . .
but not quite.
I was up about 9:30 this morning, and after coffee, got to work on my first plumbing project, replacing the flush ball and seals on our Sealand toilet.
Actually the problem wasn’t with either the flush ball or the seals, but with the plastic shaft that lets the pedal turn the ball. Over time the square edges of the shaft rounded off until the spring cartridge and the foot pedal could no longer turn the shaft, which means you could no longer flush the toilet.
I guess this is why the shafts are now made of brass.
I had turned the shore water off when I got home last night, so all I had to do before I got started was to turn off the pump, and open the lavatory faucet to drain the system. Then I started out by loosening the band clamp that holds the bowl and base together and then removing the two plastic half clamps.

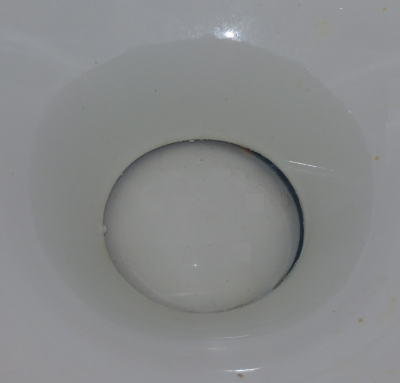
At this point the bowl is now just sitting on the base, so don’t bump it. Now I reached behind the toilet and pulled out the vacuum breaker.
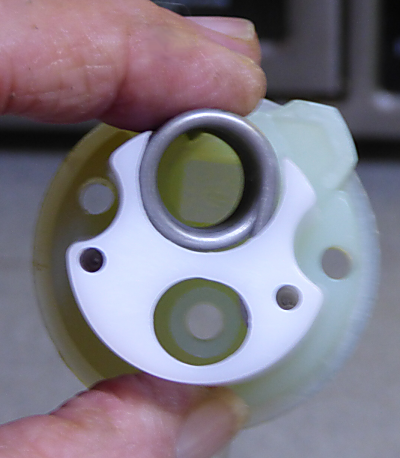
Next I carefully lifted the bowl and set it aside on a large plastic garbage bag. Now I could remove the water valve, spring cartridge, and the pedal by taking out the two screws. Then I turned the flush valve upside down, and after removing the screw I was able to pull the flush ball and shaft out.
About this time I decided that maybe having my usual big 32oz mug of coffee this morning wasn’t a good idea when I wasn’t going to have a working toilet for several hours. Note to self for future plumbing projects.
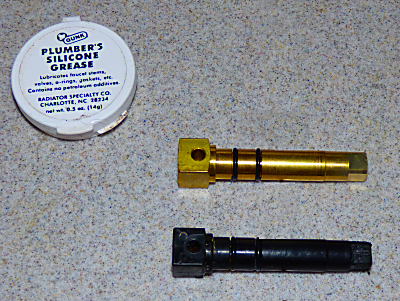
At this point I going to reveal a closely held secret. The directions say to just install the new flush ball and shaft the reverse of how you took the old one out. But that’s impossible.
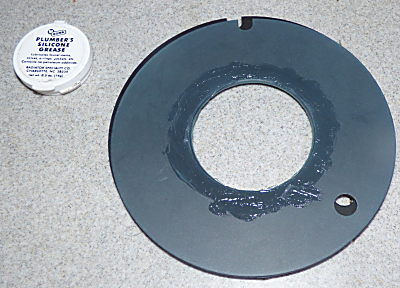
Oh, installing the new brass shaft is not a problem. Just coat the O-rings with Plumber’s Silicone Grease and slide it in place. But getting the flush valve down through small hole, turning it sideways, and then squeezing it until it snaps into place is a whole ‘nother story.
It can’t be done that way, and a lot of complaints on RV.net back me up. But here’s the secret.
Use a tie-wrap to pre-squeeze the flush ball, lower it in the hole, turn it sideways, and holding the tie-wrap end so it doesn’t fall in the black tank, just snip the tie-wrap. And now it will snap right in place.
Now just insert the screw that connects the flush ball to the brass shaft and tighten it down. I noticed that they give you an extra screw with the flush ball kit because it’s real easy to drop one in the tank. It has to be inserted at an angle and then straightened up and tightened. And you don’t have a lot of room.
At this point I was on the home stretch . . . I thought. All I had to do was to install the spring cartridge, foot pedal, and the water valve. But the spring cartridge wouldn’t fit. It’s supposed to slide on the brass shaft, and then you twist it back and forth a little until the square end of the shaft fits in the square slot on the spring cartridge.
But it just wouldn’t snap into place. And after fighting it for 10 minutes or so, I took it back apart and looked it over. And here’s what was wrong.
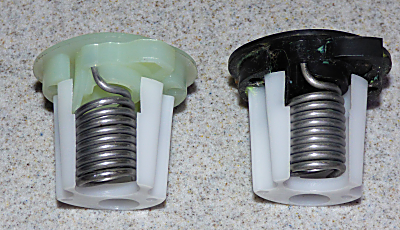
The spring on the new cartridge was installed crooked, and looking down the hole you can see that it keeps the shaft from being able to line up with the square hole.
I pried at the spring for a while with no luck at fixing it. But lucky for me I had saved my old one, and since it still looked good with no wear, right back in it went.
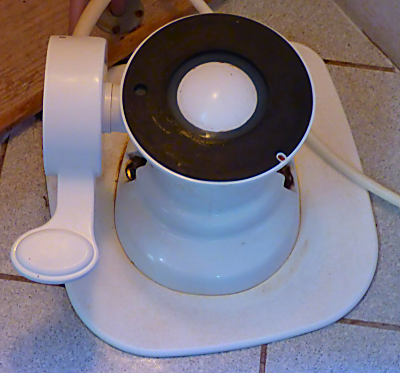
Now everything went back together without a problem, and that part was done.
And after greasing up the two new seals,
I laid them in place on top of the ball, and set the bowl on top. Then I put the two plastic half clamps on, and used the stainless steel band clamp to fasten the top and bottom together.
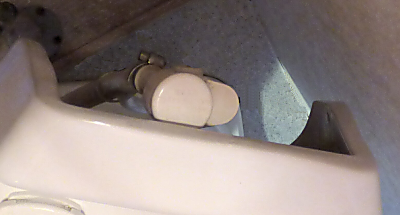
Then plugging the vacuum breaker back in, I turned on the water pump and gave it a try. And it worked.
Water ran in, the ball opened and closed, and two hours later I still had water in the bowl.
One note here: Although they call that tube at the back of the toilet a vacuum breaker, which it is, it’s also the water supply to the toilet itself. This is where the water that fills the bowl comes from.
Readers may noticed that I did a lot of describing stuff without a lot of pictures. And there’s a reason for that.
I was working on a toilet! And in some cases, the inside of the toilet! I won’t say any more. I’ve read about a couple of RV’ers who were going to do this type of repair for themselves, got it kind of apart, and were so grossed out by the smell and the sight that they gave up and paid someone to finish it.
I spent my junior and senior high school year summers working for a HVAC and plumbing company, and quickly got inured of this by having to crawl around under people’s houses looking for . . . and finding leaky sewer pipes, and wading around in septic tanks in hip boots looking for clogs. You just get used to it.
I’ve included a YouTube video below that details disassembling the toilet, replacing the seals, and putting it all back together. It does not cover the flush ball replacement.
And based on the cleanliness of his toilet, I can only suspect that either this toilet had never been used, or he spent a couple of hours cleaning it up before he made the video. This idea is reinforced the toothbrush lying on the floor in a few of the scenes.
Besides mine, I’ve worked on three other RV toilets, and they all look more like mine, than his. Just saying.
I wonder if his wife knows that’s her toothbrush?
Next up was Job #2. Replacing the lavatory faucet.
I had worked on this several months ago, pre-gate, but ran into a problem. The water connections came loose with no problem, but getting the hold-down nuts loose, the ones that fasten the faucet to the counter top, brought things to a halt. I could not get them loose.
But now I had this faucet wrench,
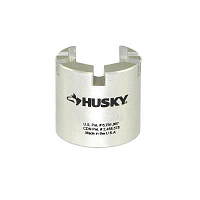
and I was all set . . . I thought.
I again disconnected the water supply lines with no problem, and then the hot water side nut also came right off using the new wrench. But when I tried it on the cold water side, I heard a ‘snap’ and all three of the little ears on the plastic nut broke off. I don’t understand why these are so tight. I installed this American-Standard faucet 5 or 6 years ago, and I know I just hand tightened them.
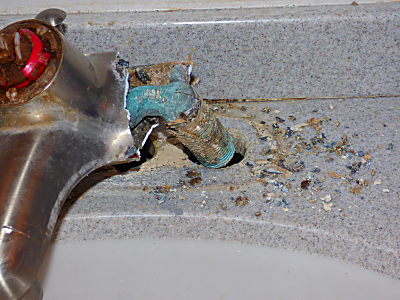
I spent the next hour trying a whole lot of different ways to get the nut off, but then finally went with one of my old standby favorites.
Brute Force!
I cut into the top of the faucet, peeled it back, and then used a hammer and a punch to break off the plastic nut from the top, and now the old faucet was free.
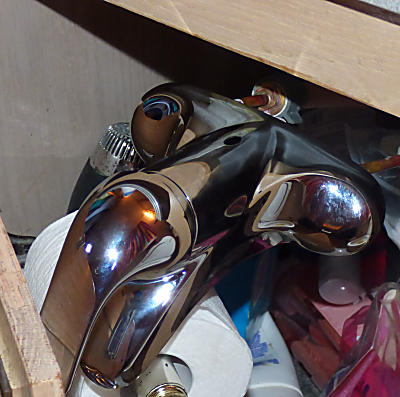
So all I had to do now was install the new one, connect the water lines, and I was done. But nothing in these plumbing jobs could be that simple.
The water supply lines coming down from the new Moen faucet hang down about two inches further than the old ones. And the rigid plastic supply lines from the coach stick up too high, so they don’t line up.
So I was going to need new connectors from the hardware store in Columbus, but it was after 6pm and they were closed. And since the coach water supply lines were still unconnected, I resigned myself to no shower tonight.
But thinking on things for a few minutes, I came up with a couple of good ideas. The first was just to connect the new faucet to the water lines temporarily inside the cabinet. Of course I couldn’t use the faucet, but I could take a shower.
The second good idea was, rather than cutting the plastic supply pipes shorter and installing new connectors, all I need to do is buy a couple of 18†flexible supply lines, and these will let me just hook the new lines up and route them around inside the cabinet. Easy Peesy.
So, tomorrow morning I’ll make a hardware store run, get the faucet finished up, and then it’ll be time to cut in the wall behind the shower and find the leak. Maybe it’ll be something as simple as a loose connection.
Yeah, Right!
_______________________________________________
Thought for the Day:
Every war is always the last war.
asdfadsf